Showing posts with label Upcycling Ideas. Show all posts

Friday, January 3, 2014

DIY Aquarium

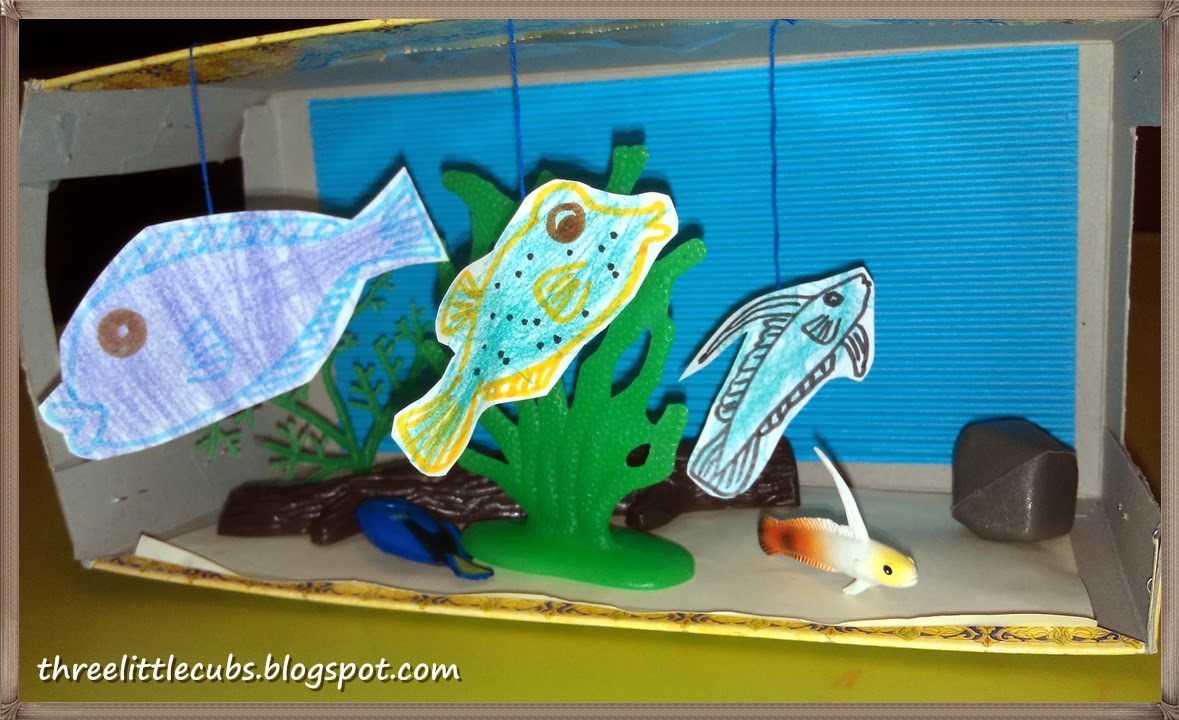
Upcycling empty tissue boxes to make little aquariums to add on to their animal families free play activities.

As a mom to multiples, I strongly encourage them to share their toys.  However, this depends on the nature or size of the toy, if the size is sufficiently big to ergonomically positioned and shared among three of them (such as the DIY cardboard carpark), I would just make 1 piece, and they would share; if the size is small, I would prefer to make 3.  

I usually keep the design simple, because I will be making 3 sets, complicated designs will takes forever to complete.  And most of all, the simplicity will give more space  develop their creativity and imagination.  

Day 1:
I helped them to cut and strengthen the tissue boxes. They will help to glue the corrugated blue paper (as water) and light yellow color paper (as sand) into the respective boxes.  Once they had completed the pasting, they were already arranging their little aquatic friends into the new 'home' 


Day 2:
I drew out some fishes for them to colour. Then I gave them thread and masking tape to hang up the fishes.  They could tape it nicely and independently. 


Syuen's Aquarium

Hung's Aquarium

Juin's Aquarium

They call this "Animals Family"
They insisted that some of the farm animals had to be there when taking this photo.


Tuesday, November 26, 2013

DIY with cardboard boxes

3 weeks ago, had DIY "roads & parking spaces" using a big cardboard box for their little vehicles. It was quite an ad-hoc idea, just pasting the roads with masking tapes. It would look better if black duct tapes were used.

Today, as I was observing their play, I have this idea of creating DIY mini doll house to facilitate their imaginative play & story telling capabilities. 
We have quite a number of empty cereal/muesli boxes (we keep all the empty boxes because we could always turn these boxes into some new toys). I'd selected these boxes with the cut-out leaves design because it could served as the windows that saves my cutting time. 

Tools used: Scissors, blade & glue
Direction: 
1) Cut out the back portion of the box, 
2) One of the side flaps might fall apart, just glue it back,
3) Using blade, slice the door or windows (3 sides, so that it could open & close)
4) Done! Time to play

Within minutes, manage to create 3 pieces (waiting for the glue to dry takes longer time than cutting). One for each of them for the time being, could create more when they are bored later (which is usually after 2 weeks).

These boxes are very versatile. We could stack it vertically looking like a tall building.


the an additional hole at the side of the box, we could add on stairs to move the people from one level to another.
 Arranging it horizontally


Or even stacking it vertically and horizontally.

However, most of the time, they might not play as how it was suppose to be.. the "house" is now a "row row boat" :)


Related Posts Plugin for WordPress, Blogger...

Advertlets